Bye Bye Green Couch

The couch is gone the couch is gone!

Three years after first obtaining our green couches from a friend upon moving into our first apartment, we finally got rid of the last one.

And it is awesome.

img_0558

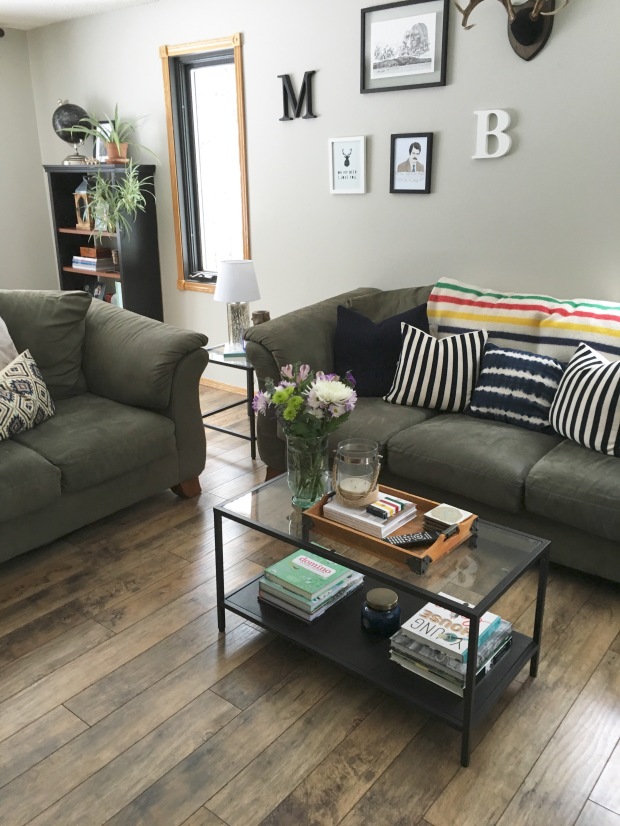
Forgive me for this photo, it is pre-DSLR, but it shows both our green couches in their full glory. I bought these guys third-hand off a friend a few years ago, when I was desperate for furniture. By the time we got them, they had been well-loved. Not the greatest quality in the first place, the support was shot in both of them, and they were too cheap to even think about replacing the foam.

Oh yeah, and they were green.

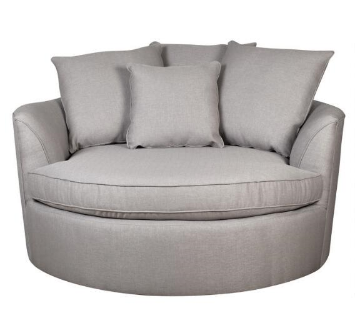
I like to think I made it work pretty well, and things blended so much that you barely noticed the sage colour. And last Christmas when I got my nest chair, I got rid of the loveseat.

And it was glorious.

temporary-2

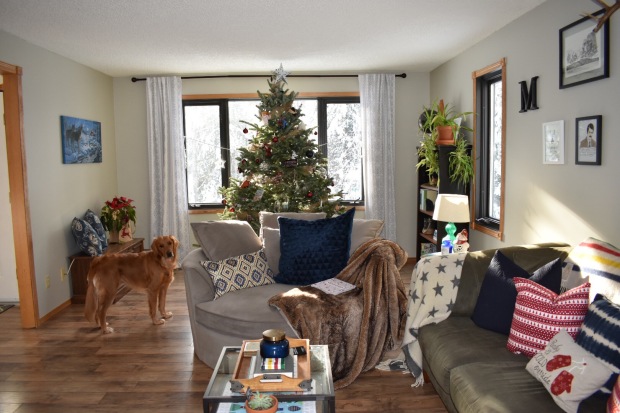
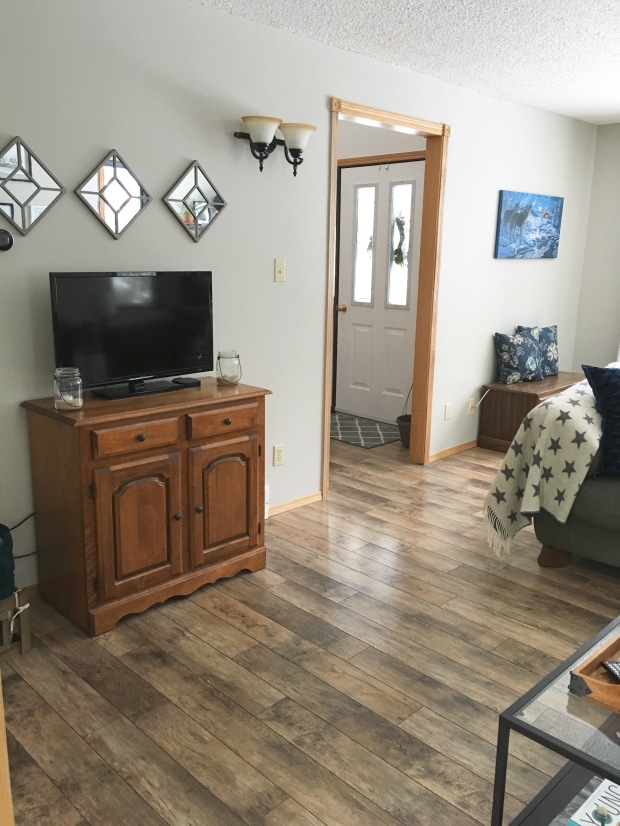
But I still had one green couch, and I knew just the thing to replace it.

A $3000 Urban Barn leather couch.

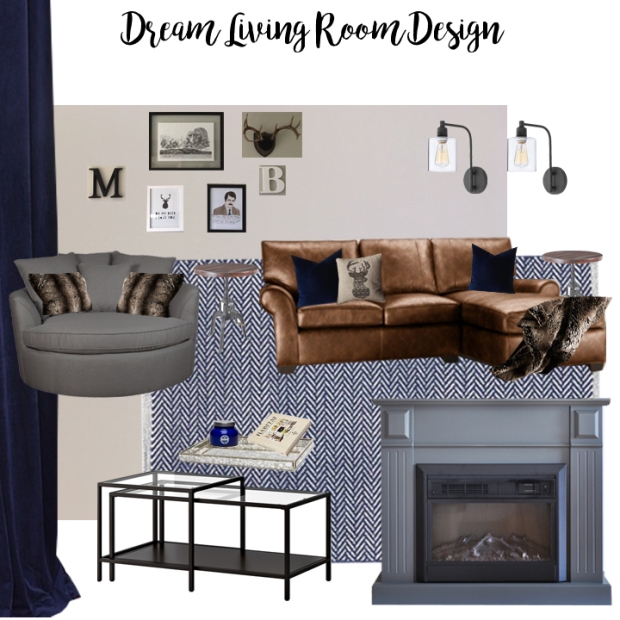
So I waited. And I dreamed about it in this post.

IMG_6480

When we got married and were given wonderful monetary gifts from our family and friends, I told Max I already knew what I wanted to buy before we put the rest in savings (see beautiful couch, above).

But I still wanted a deal.

So, when we walked in to Urban Barn in Winnipeg after our honeymoon and saw this guy on sale, I had to have it.

The salesperson gave us an additional hundred dollars off, and so we ended up getting it for 66% off. DEALS.

This was a floor model and no longer produced (hence the deal) but there are a lot of similar Urban Barn couches HERE.

IMG_6476

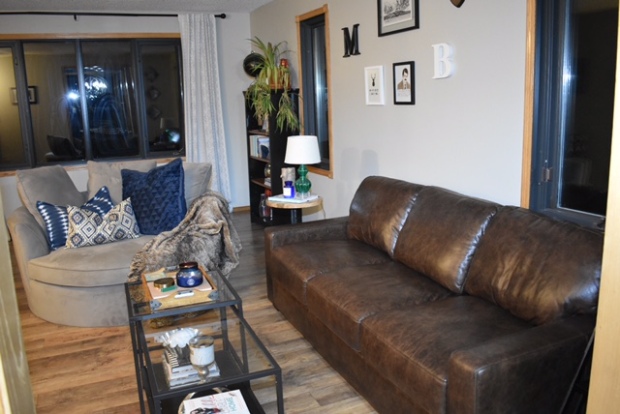
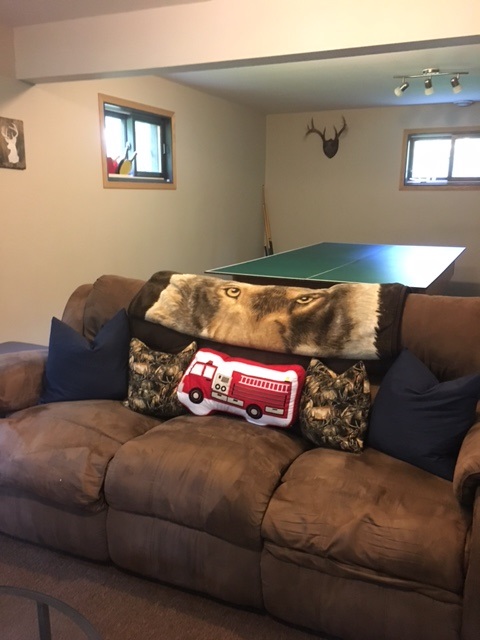
I just love the warmth the leather brings to the room. I’m looking forward to the patina over time, and this kind of couch just gets more beautiful with age. The leather is not bonded either, but real leather, so we really did get a steal for the quality.

IMG_6475

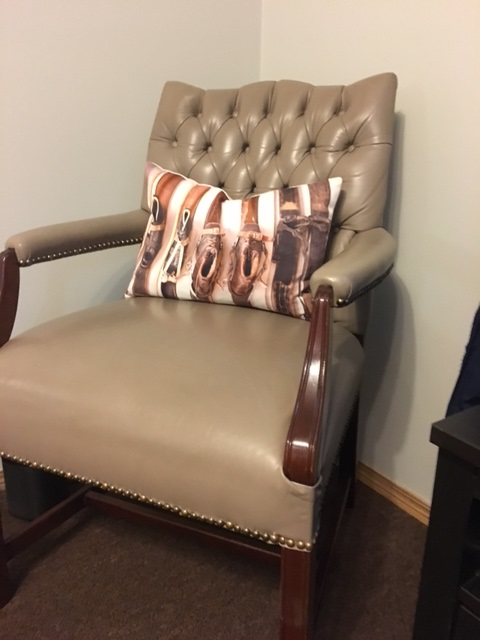
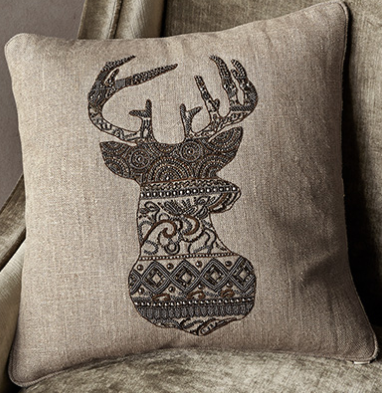
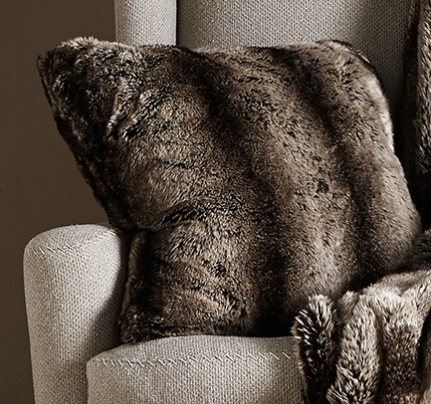
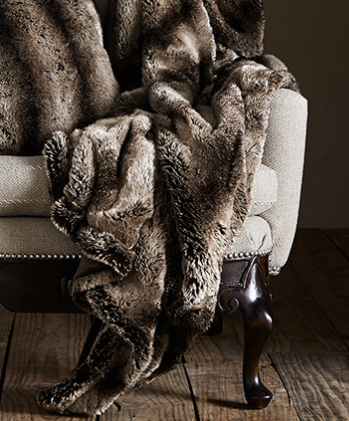
The lady also asked if I had pillows for the couch or if I would like to pick some out. Please.

IMG_6474

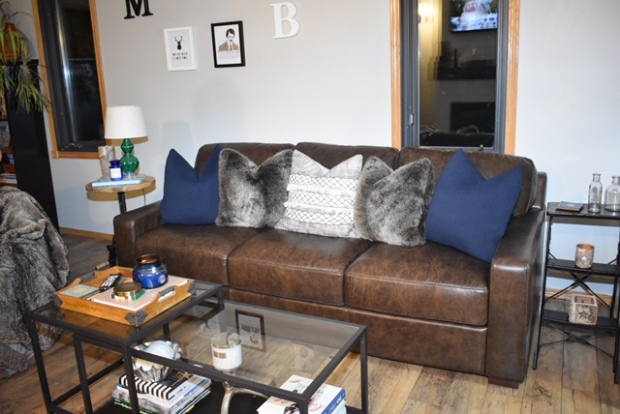
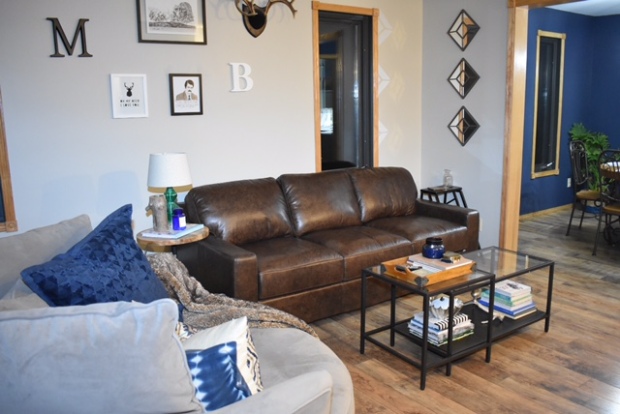
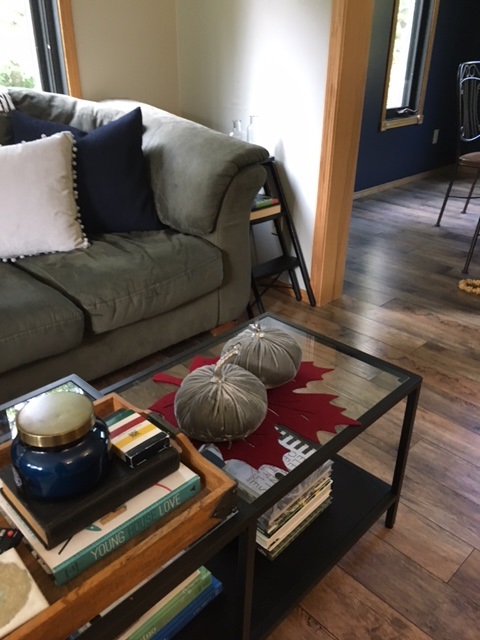
Now between this couch and my nest chair, Urban Barn is taking over my living room.

IMG_6472

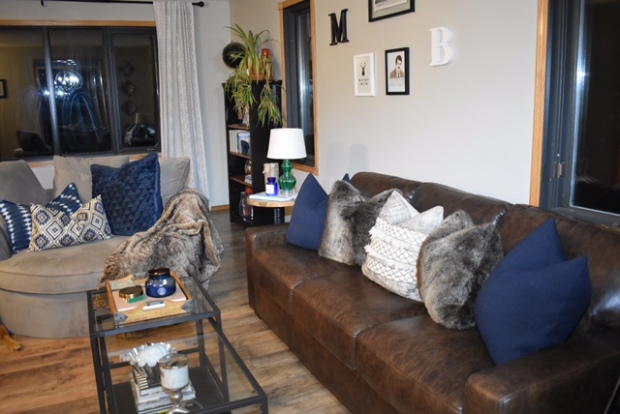
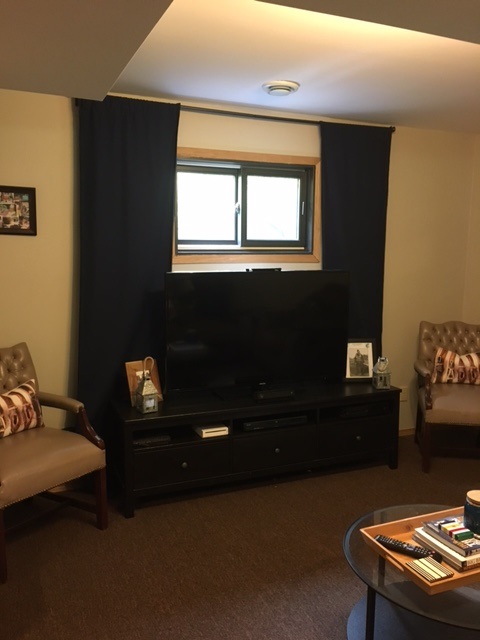
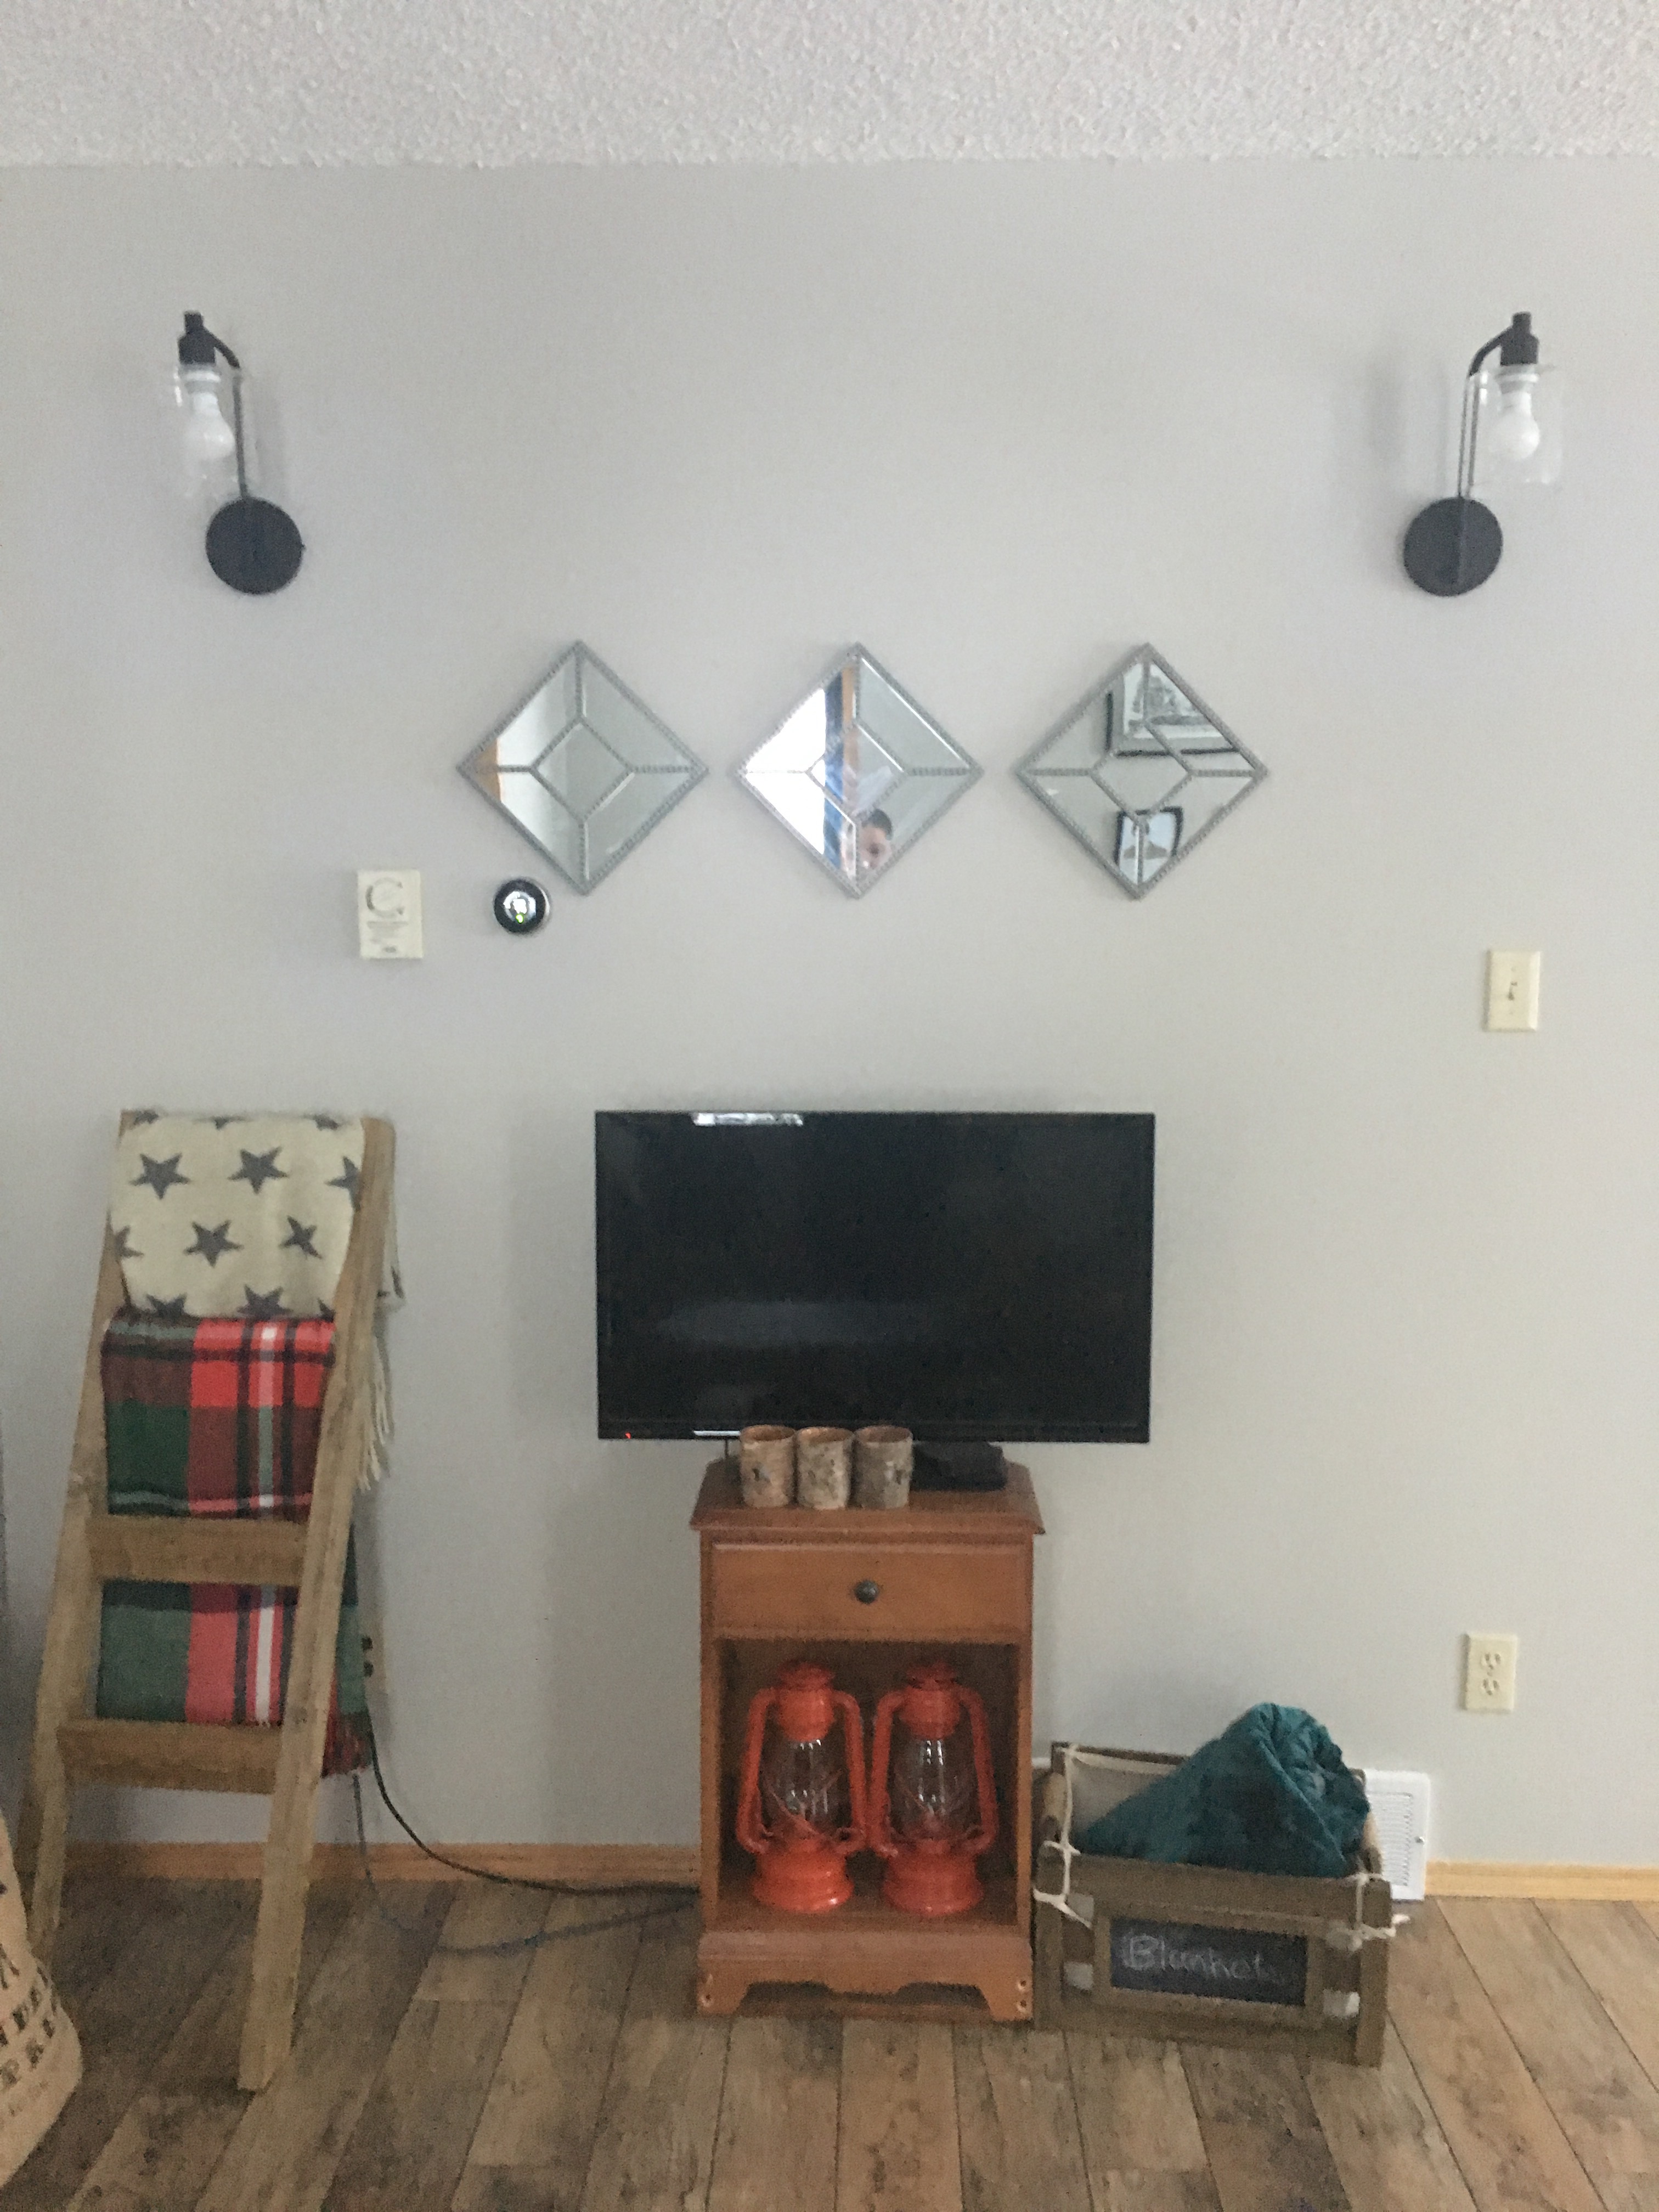
There are a few more changes I want to make in here (including curtains, a rug, new bookshelf, move the piano in, you know, just SEVERAL things), but this is a great step towards my dream living room.

IMG_6471

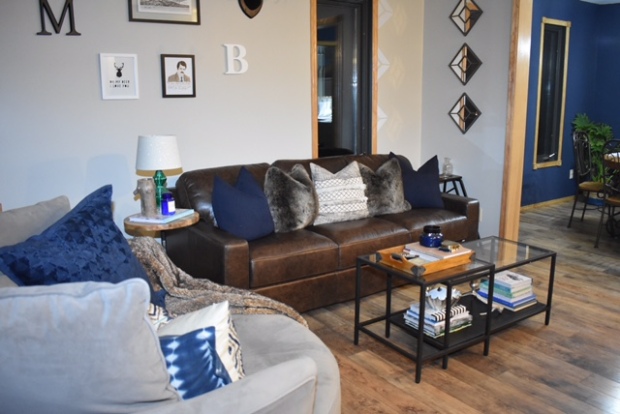
The low profile of this couch also makes a huge difference. This also makes me want a new basement couch as well #createdamonster.

Let me know if you have any questions.

May Was Crazy & Some Shopping 

I post on average seven times a month, just about twice a week. 

But in May I posted once.

Oops. 

I have a lot of excuses, but basically May was insane. I went to Vegas at the beginning of the month for my bachelorette, we had our wedding social, and May Long Weekend was spent out at camp. So the blog was on the back burner. And nothing was really accomplished Project wise anyway to blog about. 


But I’m getting back into it now that it is June and I have a lot of projects and posts planned! We hope to learn to tile and get some backsplashes and a floor done. And on top of that, I want to move forward with a plan for the main bathroom. 

Until then, I’m in Thunder Bay for work currently. I have some recent house updates to share as well as some things I saw and some things I bought: 

Also I’m here all week so there may be a part 2 of this. 


To prepare for summer I hung my new boxwood wreath on a burlap strip. I hung my monogram in the centre as per usual. 


I also picked up a new doormat that I thought was funny when I was in Winnipeg. 


I saw this vanity top at Home Depot and made note of it since this is a great price for  a 49″. I only have one more yellow vanity top and I am determined to replace it! 


This moose sketch was at Homesense and I thought he was cute.


This mirror was also at Homesense and I have been wanting a wood frame mirror for the main bathroom. Not sure if this one is too big and Max is measuring back home for me. 


This vanity was at Lowes and I love the lines of it and the black metal. Would look great in a small space and very affordable. 


And this. The most exciting thing. 

This picture above is from October when I saw this tile in Home Depot and walked away from it because I wasn’t ready. 

I’m still not ready now but when I talked to a lady that worked there and realized they only had 87 square feet left, I had to do it. 

So I have tile ready to go as soon as we decide to learn to tile. And it is so pretty and I LOVE IT. 

It is glazed porcelain so even though it looks so nice and vintage it will be tough enough for a floor. 

I grabbed it (after they forklifted it down for me) and hopped right out of there! 

I have a few more nights in Thunder Bay but I am excited to get it home. 

Let me know if you have any questions. 

Building a DIY Fireplace Part 1: Framing 

I am so excited to be able to say that our fireplace project is almost done. When we first looked at the house and decided to buy it, literally the only thing on our list that it didn’t have was a fireplace.

It’s just something I always wanted, mostly for the ambiance, and let’s face it, mantle décor.

I knew I would eventually want to add one, but I never expected it would be so soon.

When we lost our buffet and had to move our TV stand in the dining room for the buffet storage, leaving our TV on a nightstand in the living room, this project became a lot more urgent. I reflected on what I wanted in a fireplace in this post a little bit ago, and now it is here! I initially thought we would just buy an electric fireplace (I love electric because I’m notoriously bad at lighting fires – so the remote start is huge for me), but when I was searching I couldn’t find anything quite my style. That’s when I decided we could build one from scratch.

No big deal.

temporary-157

I ordered this electric fireplace insert from Costco, which unfortunately arrived broken, but they sent us a new log set and we got right to framing anyway.

temporary-185

I started with a picture in my head and a pretty crude sketch, and Max forced me to come up with some measurements to add to it. Then he used 2 x 4’s to frame it out, starting with the boards screwed to the floor, and then the back wall. I also drew on my wall a whole bunch to figure out how tall I wanted the firebox, mantle, etc. I needed visuals, okay?

temporary-186

Next he framed out the height of the mantle and the height of the firebox, which he reinforced with vertical 2 x 4’s and made it two 2 x 4’s deep to support the firebox.

temporary-187

Then we had to test and make sure it fit, obviously.

temporary-188

The log set was still broken at this point but it fir perfectly and it worked!

temporary-189

Next he framed out the “chimney” area to the ceiling, which was set back from the mantle.

temporary-190

And then I had him add this complete pain – a niche for where the TV would be mounted.

temporary-191

He framed the niche completely and we added the firebox back in and called it a night for the first day of work.

temporary-192

The next time we worked on it we had to add the underlay to give it some shape and act as a base layer. Max cut as large of sections as made sense, and nailed them in.

temporary-193

This took a ridiculously long time. Finally, he got the whole thing covered, and we had a big pink fireplace.

temporary-194

And that’s where I am going to end Part 1! The next step was painting this underlay and then getting to work on the shiplap which is the most exciting part (in my opinion)!

Let me know if you have any questions and stay tuned for Part 2!

Linked up via Thrifty Décor Chick.

We Moved Our Thermostat (And It Wasn’t That Hard!)

We have officially begun work on the fireplace project (kind of). You see, when I was scheming and dreaming about building a fireplace on the living room wall, I realized that either I was going to have to move the thermostat, or have a seriously skinny fireplace.

I went for the former.

This actually wasn’t too difficult. Max told me it would take just a couple minutes (which it definitely didn’t) but it was certainly done in under an hour.

Also, yes my wall still has patches of paint that don’t quite match. I will paint this wall corner to corner after the fireplace is in. Also my TV is still on a pathetic nightstand and I watch a lot of Friends.

temporary-131

My initial plan was to move the Nest thermostat over to the left of the humidifier control.

temporary-132

Max removed the thermostat and checked to see how much wire was in the wall. From my research, most thermostats should have quite a bit of extra wire, so moving it short distances should be easy.

temporary-133

We were very happy to find we had quite a bit in the wall so we wouldn’t have to add any more wire!

temporary-134

Max started by drilling a hole to the left of the humidifier control but then realized there was a stud there, and moving the wire through the stud to the new location would be pretty impossible without cutting out a large piece of drywall, drilling through the stud, and then repairing it later.

I don’t like to drywall. So, we decided to line it up above the humidifier control instead.

temporary-135

Max came up with this very sophisticated (not) way of using electric tape to attach a zip-tie to the wire so he could fish it through the wall. Professionals have fancy fishing tools and magnets to do this, or at the very least, a wire coat hanger. We only had plastic coat hangers in our house, so this worked fine. Above, he is pulling it through the new hole. He made sure it was pulled all the way out of the wall before starting so he didn’t risk dropping it in the wall.

temporary-136

Then he screwed the Nest thermostat back into place.

temporary-137

And finally, he re-attached the unit to the wall.

temporary-138

He put some spackle on the old hole, as well as the one he had drilled on the left and left it to dry. It still has to be sanded a bit, and then painted, but I don’t see much of a point to painting until the fireplace is done? We’ll see.

temporary-139

Let me know if you have any questions. Now all we have to do is actually build a fireplace, no big deal.

Linked up via Thrifty Décor Chick

New Light Fixtures and I Painted the Ceiling 

When we were in Winnipeg, I picked up a beautiful Moravian star light fixture at HomeSense. Obviously, I wanted to put it up immediately when we got home.

The previous fixture was a boob light (above) and certainly nothing special, so we took that down and started to work on installing the new one.

I cannot get over how pretty this light is.

I have to stay this “compare at” is bang on, and I’m very happy with my deal, even if it is something I wasn’t planning to buy right away.

Unfortunately, since the new light would take much less ceiling space than the old boob light, I had to do a paint touch up. I added some white to match the ceiling, but it didn’t match at all.

I realized the rest of the ceiling in here was very dingy, and either way it had to be painted. So I asked Max if he thought it would be fun to paint the ceiling a colour.

He said no.

So I did it anyway.

He brought up that I had repainted a lot of ceilings in the house white that had previously been colours, and that I had said a ceiling painted a colour can feel heavy and like it is closing in.

Why does he have to remember everything?

Yes, I did say that. But for a space this small, and where the walls are already so light (Blank Page by Beauti-Tone), I thought the ceiling could really work well as a fifth wall of sorts, and a cute pop of colour.

Especially if that colour is navy blue.


I did the patch around the light first (in my favourite navy, Rooftop at Midnight by Beauti-Tone) so Max could hang it and I would have light for the rest of my work. He struggled with this one as he did with the last hanging fixture, but it got done eventually so I’m happy.

And then I cut in and rolled the rest of the ceiling. It didn’t take long, since this is such a small room, but my shoulders and neck didn’t particularly like it either.

I love the way the light looks against it. Max calls it the “Starry Night” ceiling.

And here it is with the light off so you can see what that looks like.

img_0540

I also picked up these sconces that I have been wanted forever from Canadian Tire. I realized we had $85 in gift cards, which made the $100 price tag (for both) easier to swallow, so I had Max hang them, and now we can officially call all main floor lighting done. I was very glad to see the old sconces go.

Unfortunately this also left a big touch up needed. You can see the previous yellow colour of the living room above.

I got more of the same paint from Home Hardware (Let’s Get Cozy by Beauti-Tone) and tried to touch it up, but it did not match whatsoever. I brought it back to the paint guy, who told me sometimes quarts can be off because he is working with fractions, and recommended I get a gallon.

He returned the mistint, and charged me the difference for the gallon. Then he gave me a card for a free gallon in the future, so I was happy.

Unfortunately the new colour is still a little bit off. I’m not about to go exchange the paint a second time, so if I can’t get over it and it doesn’t blend over time, I will use the “corner to corner” method of essentially just painting this wall with the new colour. Since the light hits all walls differently anyway, you can’t tell if one whole wall is slightly different the way you can if just a patch on a wall is.

Of course you can’t tell in the pictures but just trust me, it bugs me.

Let me know if you have any questions on my new lights! We really need to get to work on the fireplace in the living room so that the pathetic nightstand can go back upstairs.

1


My Dream Living Room

Max and I are at a point in our lives right now where we’re not exactly flush with cash all the time.

Most of our furniture was handed down, found at yard sales or thrift stores and given a makeover, or purchased from HomeSense for a steal, because we just can’t afford to buy everything we could ever want for our house right this second.

I love to update our house as I go and as funds are available, and I love DIY, so I don’t necessarily need my ideal room at the moment, and I don’t mind doing things slowly.

But I can dream.

Untitled-1.jpg

And I can photoshop.

Max and I recently purchased our first real piece of furniture together. Our mattress was purchased for us by his parents when we moved in together and paired with a DIY headboard, and our house came with some couches that weren’t pretty but were perfectly functional, and I got my other set of couches off a friend for $100. Therefore, we had never gone shopping for a bedroom or living room suite before and buying our first chair was awesome.

I plan to do a whole post on our experience ordering a custom piece of furniture in the future, but for now, let’s look at the dream living room that I built around the chair we ordered as well as a gorgeous couch from Arhaus.

4

This is the Brentwood 94″ Two Piece Leather Sectional in Bronco Whiskey and it is stunning. I love the idea of a medium brown leather sofa for our living room, and even though this one is currently on sale, it is still out of my budget.

I actually waffled on whether to include a sectional or a regular sofa in this dream design, since technically only a standard sofa would fit in the room. I love the chaise side of this sectional though, and since I’m just dreaming I went for it. I added some navy velvet pillows on the couch (which match the heavy navy velvet drapes I included) as well as this beautiful beaded deer head pillow, also from Arhaus.

1

For the rug, I selected this Dash and Albert Herringbone one from Wayfair in navy that I have had my eye on for awhile.

2.png

I like the subtle pattern, but it is still fairly neutral.

You may notice that I included the same coffee table that is currently in my living room. Even though it is from IKEA, I wouldn’t change it even in my dream living room – I love that table!

untitled

On top of the table I added this pretty tray from Arhaus, I love the patina and a good tray to corral items on a coffee table is ideal. In the tray I put Habitat, a good coffee table book by fellow blogger Lauren Liess, and my favourite candle (Capri Blue Volcano, found here)

I also included my current gallery wall, because I still love it and I’m proud of how it turned out. My favourite part of it are the antlers, which are real, but if you don’t have access to a hunter like Max you could consider something like this.

6

It is made of wood but gives the same effect as a real bust!

The crank tables I included as end tables are meant to represent the cool crank one I have now – though ideally I would have a second matching one for the other side of the couch as shown.

7

This is the chair we recently ordered, which would go in my ideal living room as well. It is from Urban Barn and can be found here, though I’m not sure if Urban Barn is Canadian only. I can’t wait for it to come in!

8

I added some of these faux fur pillows on the nest chair, and a matching blanket draped over the sofa. I am obsessed with faux fur around the house right now!

9

You’ll also notice a giant grey fireplace was included. The one thing our house didn’t have when we purchased it was a fireplace, and so I hope to build one ourselves with an electric insert someday. The one I included is just a representation of our eventual one but I thought it was very pretty.

And last but not least, the lighting. I included two of these wall sconces that I have talked about wanting before from Canadian Tire.

10.png

Overall, this makes up the living room of my dreams, and I do plan on achieving something like this eventually, but DIY and adding items slowly is half the fun!

untitled-1

I hope you enjoyed this peek into my brain, and I think this will be helpful for Max to see my vision as well! Stay tuned for more on our new chair as well as an exciting change in the dining room!

Let me know if you have any questions.

1


Changing Things up – New Pieces and New Chairs

Recently, I’ve done a fair bit of rearranging around my house, taking some things out, but mostly adding some new purchases and a few thrifty makeovers.

So I’m going to dump all that information here now.

The first thing is this little owl I picked up at the Salvation Army. He was a bright chrome silver but Max said he wanted him black so I busted out the spray paint.

5

And then I put him on top of my cabinets next to the galvanized milk can that I spray painted a few weeks back and said I would show you.

2

Next up is this adorable fire truck pillow that my dad found in the kids section at HomeSense and I had to buy to make Max happy. He’s a volunteer firefighter, so I stuck this in the basement, moving it around a couple times.

7

This is where it’s sitting right now.

12

I also picked up these grey velvet pumpkins at HomeSense and they are currently on my coffee table with the felt leaf placemat from Dollarama underneath.

13

These pumpkins that I shared in this post are sitting on the buffet in the dining room.

6

I got this tin sign from my mom and Max and I hung it in the bar area.

14

I finally added this deer rug to the office now that we have new flooring in there. I love it.

untitled

And…I bought some more pillows. I know I have a problem. I decided I wanted a cozy looking bed heading into fall and winter so I had no choice but to buy some new pillows really.

The center pillow is actually just a new pillow cover that I put on my euro square. I got it with a Sears giftcard I’ve had in my wallet for years.

The two pillows on the sides are similar to a velvet look but they’re not really velvet? They are very soft and came in a pack of two from HomeSense.

The bolster in the front I fell in love with, also from HomeSense. The antlers are fur and the rest of the pillow has a great texture, similar to tweed.

I have had the fur blanket for over a year now, it is from The Bay.

9\

Last but not least, are my new chairs. Aren’t they pretty?

11

This fall, my brother moved to Thunder Bay for college, and my upholsterer uncle offered him some chairs he had in his shop to help furnish his new apartment.

As soon as I saw these I knew I couldn’t let them go to a college boys apartment, so after a lot of bargaining back and forth, I traded one of my large brown recliners and a dinner out next time I’m in Thunder Bay for work for these two beauties.

1.png

Just look at the nailhead trim.

8

I think they frame my window and tv stand really well.

Let me know if you have any questions.

1

Future Plans and The “House To Do” List

In my last couple posts, I mentioned wanting to talk about our future plans in the house and the “House To Do” list that we created before we even moved in. So that’s what I’m going to do.

The actual physical list is on our fridge and is constantly updated. I have it saved as a word document, so I can move things that have been completed to the end of the list and strikethrough them, and of course, every time I cross off one thing I add two new things to the top of the list.

I think you get how lists work; here are some things that are on the list now that we want to do, I will post again in the future with some more of the things on the list:

img_2519

A new floor in the upstairs main bathroom, or the “bathtub room.” This room currently has the ugly old linoleum that all the bathrooms in our house came with. I hope to put the same luxury vinyl tile that we used in the powder room in here.

img_0627

In the ensuite upstairs, we also want to change out the flooring as it is still sporting the ugly linoleum.

img_2517

I’m hoping for a black and white hex tile in here.

24

Something I hope to do throughout the house is to spray paint or replace all the brass door knobs and closet knobs. I also want to get a pretty new door handle for the front door, likely in black. And maybe a prettier door bell. We thought it broke and were looking at some new ones awhile ago but it turns out the battery just died.

IMG_1101

I also want to replace the ugly sconces in the living room. The shaded glass (brown ombre!) and the oil rubbed bronze really aren’t my taste.

img_0541

I hope to replace them with these sconces from Canadian Tire.

1.png

Also in the living room I hope to replace the couches eventually, and perhaps get a nest chair! I also want to build some kind of bench for Remy at the front picture window because she likes to look out. We may also add an electric fireplace someday and try build it in to look more permanent.

2

In the powder room, I hope to replace the yellowed vanity top with a white one like we did in the ensuite and get a new waterfall faucet. The issue is a waterfall faucet in brushed nickel at a reasonable price is hard to find.

I also want a new faucet for the upstairs main bathtub bathroom but I’m not sure on the style I want.

In the basement bath I just need a new light for it to be considered “done.”

Right now it is just a vanity style track light with four light bulbs in a row. I don’t have any decent pictures of it because I hate it.

Another thing I want to do (or get Max to do) is pressure wash the siding and secure the weatherstripping around the garage door, which is a little loose because the screws are fairly far apart.

10

In the kitchen I eventually want to replace the laminate countertops with a marble-look quartz, install a subway tile backsplash, and of course get a range hood (recirculating).

I also really want a Moravian star light in the mudroom area that is off the kitchen and connects to the garage.

1.png

And I think that’s enough of my crazy plans for today!

Like I said I have many things on the list and will share some more later. It’s important to note that I do not expect this to be a quick process by any means, but it is fun to dream.

Let me know if you have any questions.

1

One Year Later

Sunday September 11, 2016 (aka two days ago) marked the one year anniversary of Max and I closing on our house.

In celebration and remembrance, I’m going to go through a whole house tour and make a nice little list of everything we managed to complete this past year! It’s also a chance to get a peek at some spaces that we’ve started to work on but I haven’t yet posted about, and get an overall current state of the house update.

When we first moved in we worked at an insane speed. Every night after work we would DIY and paint and build for hours before bed, and then we would do it all again the next day. Eventually, after about a month, we slowed down, moving onto larger projects with larger timelines and bigger budgets outlining said timelines.

But overall I’m really happy with what we accomplished in a year and cannot wait to see what we have done next year at this time.

Let’s get into it I have a feeling this will be a large post.

img_2539

If you look close you can see Remy in the window wondering why I’m outside taking pictures.

On the outside of the house we:

img_2541

In the garage, we:

  • decommissioned and got rid of an old, energy-sucking fridge
  • updated the garage man door into the house and added a star
  • insulated the workshop area, which had previously only been framed in (look for an update on this soon)
  • added a can crusher to the wall, and our recycling areas
  • moved my car in, of course
  • changed lightbulbs out for CFLs
  • added drywall to the outside wall of the workshop – which I may tape and mud if I feel ambitious

1.png

In the back porch/mudroom area, we:

  • added our rugs so we didn’t drag dirt all through the house
  • painted the walls Blank Page by Beauti-Tone
  • removed a bunch of hooks from the wall, leaving only one set in the recessed area
  • added an ottoman so we had a place to sit while putting shoes on
  • added Remy’s dog butt hook from IKEA, for her collar and leash

img_2552

img_2550

In the kitchen, we:

12

In the kitchen banquette area, we:

img_2554

img_1080

In the front door/foyer area, we:

FullSizeRender

img_0450

In the powder room, we:

  • painted the walls Blank Page by Beauti-tone, they were previously a light blue
  • changed out the flooring for luxury vinyl tile, which we installed and grouted ourselves
  • changed out the lighting to a plain silver light
  • painted the vanity cabinet Rooftop at Midnight by Beauti-tone
  • painted a wooden bench from the porch white, and brought it inside with some pillows to fill the space behind the door where the washer and dryer used to be
  • filled in the dryer vent hole in the floor
  • changed out the towel rod and toilet paper holder, from oak to silver
  • added a mirror

In the living room, we:

img_0558

In the dining room, we:

img_0646

Upstairs, we changed up the office by:

img_0426-1

In the other bedroom we:

img_2524

In the master bedroom, we:

  • moved the fan in from one of the other bedrooms
  • changed the colour of the fan blades (by flipping them over)
  • hung the curtain rods nice and high
  • I made curtains myself and hung them up
  • painted the walls Let’s Get Cozy by Beauti-tone
  • removed some cables for TV and an ugly hunk of wood off the wall
  • hung the headboard I made in the apartment
  • changed up pillows endlessly
  • moved in a chair we got from Max’s parents garage
  • hung a sunburst mirror, because I’m obsessed
  • moved all my crap into the closet because Max is awesome and let me have it to myself

img_2508

In the ensuite we:

  • painted the vanity cabinet black and changed the hardware
  • added a new vanity top
  • painted the walls Blank Page by Beauti-tone (previously pink including the ceiling)
  • added some art
  • removed a horrible medicine cabinet from the wall and added a nice simple mirror
  • changed out the oak hardware(towel bars, toilet paper) for chrome
  • changed the faucet for a high arch chrome one

img_2517

1.png

In the main bathroom upstairs, we:

  • painted the walls Let’s Get Cozy by Beauti-tone and the ceiling white (both were previously blue)
  • painted the vanity Hearth Stone by Beauti-tone (a mistake I am correcting)
  • added our shower curtain
  • replaced the lights with a new vanity light and a plain silver overhead light
  • removed the medicine cabinet and put up a new mirror
  • replaced the knobs and hardware (towel rod) with brushed nickel
  • fixed the bathroom towel closet (which wasn’t closing properly)
  • added a new shower curtain rod
  • hung some lettering art and new towels

On the stairs leading to the basement we:

img_2555

In the main basement area, we:

  • knocked down a wall to the furnace room
  • replaced the wall further back to re-enclose the furnace
  • drywalled the area and added a door
  • installed new flooring in the area and added trim and a silver transition strip
  • painted the new bar area Rooftop at Midnight by Beauti-tone and the rest of the basement Let’s get Cozy by Beauti-tone. Painted all the ceiling white (previously tan)
  • built a bar out of pallets and added a counter
  • added a shelf behind the bar
  • added some décor (tin signs) and some stools
  • added décor and rearranged furniture in the rest of the basement
  • got a dartboard and a ping pong topper for the pool table
  • added curtains and a rod (hung high) behind the TV to minimize glare

img_2556

In the unseen rooms of the basement (laundry, freezer and furnace rooms) we:

  • moved in a futon bed in case anyone needs to spend the night
  • got a new washing machine after ours died
  • added some storage shelving and our filing cabinet
  • cleaned all the filters for water, the furnace, etc

1.png

In the basement bathroom we:

And throughout the house we:

  • made sure all the light switch and outlet covers matched (they were all different before)
  • spray painted any brass we could find, including the vent covers for the air ducts in the floor (doorknobs are next)

And that’s how much you can get done in a year!

I hope to post a list of what we hope to accomplish in the future soon.

Let me know if you have any questions.


Painting Pumpkins and Saving Money

You may remember the last time I was in Thunder Bay and I put up a shopping post there were a lot of pumpkins involved.

1

As much as I wanted to buy all of them, I like Max and I want him to stick around. The amount of throw pillows I have brought into our house is bad enough (43), and so I’m not sure he or our bank account would tolerate a million $30 pumpkins.

So.

I got crafty.

img_2250

I picked up a couple different size pumpkins at the dollar store, three larger different shaped ones and then a pack of little guys. They obviously felt a lot cheaper than the HomeSense ones, and the horrible paint jobs weren’t helping to make them appear more expensive either.

2

3

First, I used some hot glue to make sure the stems were attached well as they were pretty flimsy.

4

Yes my hot glue gun is pink.

img_2254

Then I took them into my painting room (aka the workshop in the garage) and laid them on some cardboard to spray.

1.png

This is the white spray paint I used.

2

I did about two coats, making sure to flip my pumpkins.

3

And then I used some black paint for the stems and to paint an “M” on one because I am still obsessed with monograms.

1

2

And then I moved them back inside. The white makes them look a lot classier and you can’t tell how inexpensive they are unless you pick them up.

3

You could brush on a chalk paint for a more rustic look but I decided to spray because #lazy.

4

Now I’m moving them around my house to find the perfect spot.

5

6


Such a quick and easy craft and they look super cute.

7

The little ones look pretty under my cloche with some pinecones.

I added some drips to the top of these ones by flicking my paintbrush over them.

img_2392

The felt leaf underneath is also from Dollarama.

Let me know if you have any questions.